
Setting up a private podcast within your own website can be a good way to tailor your content to specific groups of listeners. It also enables you to monetize content with subscription payments. But you might be wondering how to go about it.
Well, it’s really simple when you use Beamly. With our website builder, you’ll get built-in membership features and payment gateways for your podcast site. It’s fully integrate within the website platform, so you don’t have to worry about mixing and matching multiple platforms or services. With Beamly, you can offer a range of membership plans (including a free tier) with different levels of content access.
In this post, we’ll take a look at the reasons to create a private podcast website. Then, we’ll show you how to do it in just three steps. Let’s jump in!
Why Should You Create a Private Podcast Website?
There are plenty of ways to monetize podcasts, like displaying ads and promoting affiliate products.
But ads can be frustrating for listeners, while affiliate links are better suited to written content. Therefore, you might consider offering podcast memberships instead.
Memberships usually function as subscriptions, enabling you to stabilize your earnings. They’re ideal for nurturing a community of like-minded individuals and building a follower base.
Keeping episodes private for subscribers increases the perceived value of your show. When you create a website for a private podcast, you’ll have complete flexibility over content access. For instance, you could make some episodes freely accessible to demonstrate the benefits of your memberships.
Many podcasters choose to have one private episode released on every few freely available ones. Others prefer to offer the same set of episodes for both free and paying members, but remove ads for paid ones. Your offering and plans can really vary and it’s completely up to you to decide how it works, how much it costs, and what you offer with each subscription plan.
You can sell subscription plans that give paying members full access to your best episodes (or certain categories). With a website, you can also protect other resources like premium blog posts, pages, videos, or community forums.
Plus, you can utilize search engine optimization to increase the visibility of your podcast in Google and attract more people to your show.
How to Create a Website for a Private Podcast (3 Steps)
Now, here’s how to set up a website for your private podcast.
1. Set Up a Podcast Website
Many people think that setting up a website is a very technical process. But with a dedicated website builder like Podcastapage.io, you get tons of designs and features that make things easier for you.
For example, you can automatically import your podcast episodes, YouTube videos, and podcast reviews. You can also customize the audio player to suit your needs.
It’s totally free to get started with Beamly. Once you’ve registered for a trial account, you can add your existing podcast or create one from scratch:
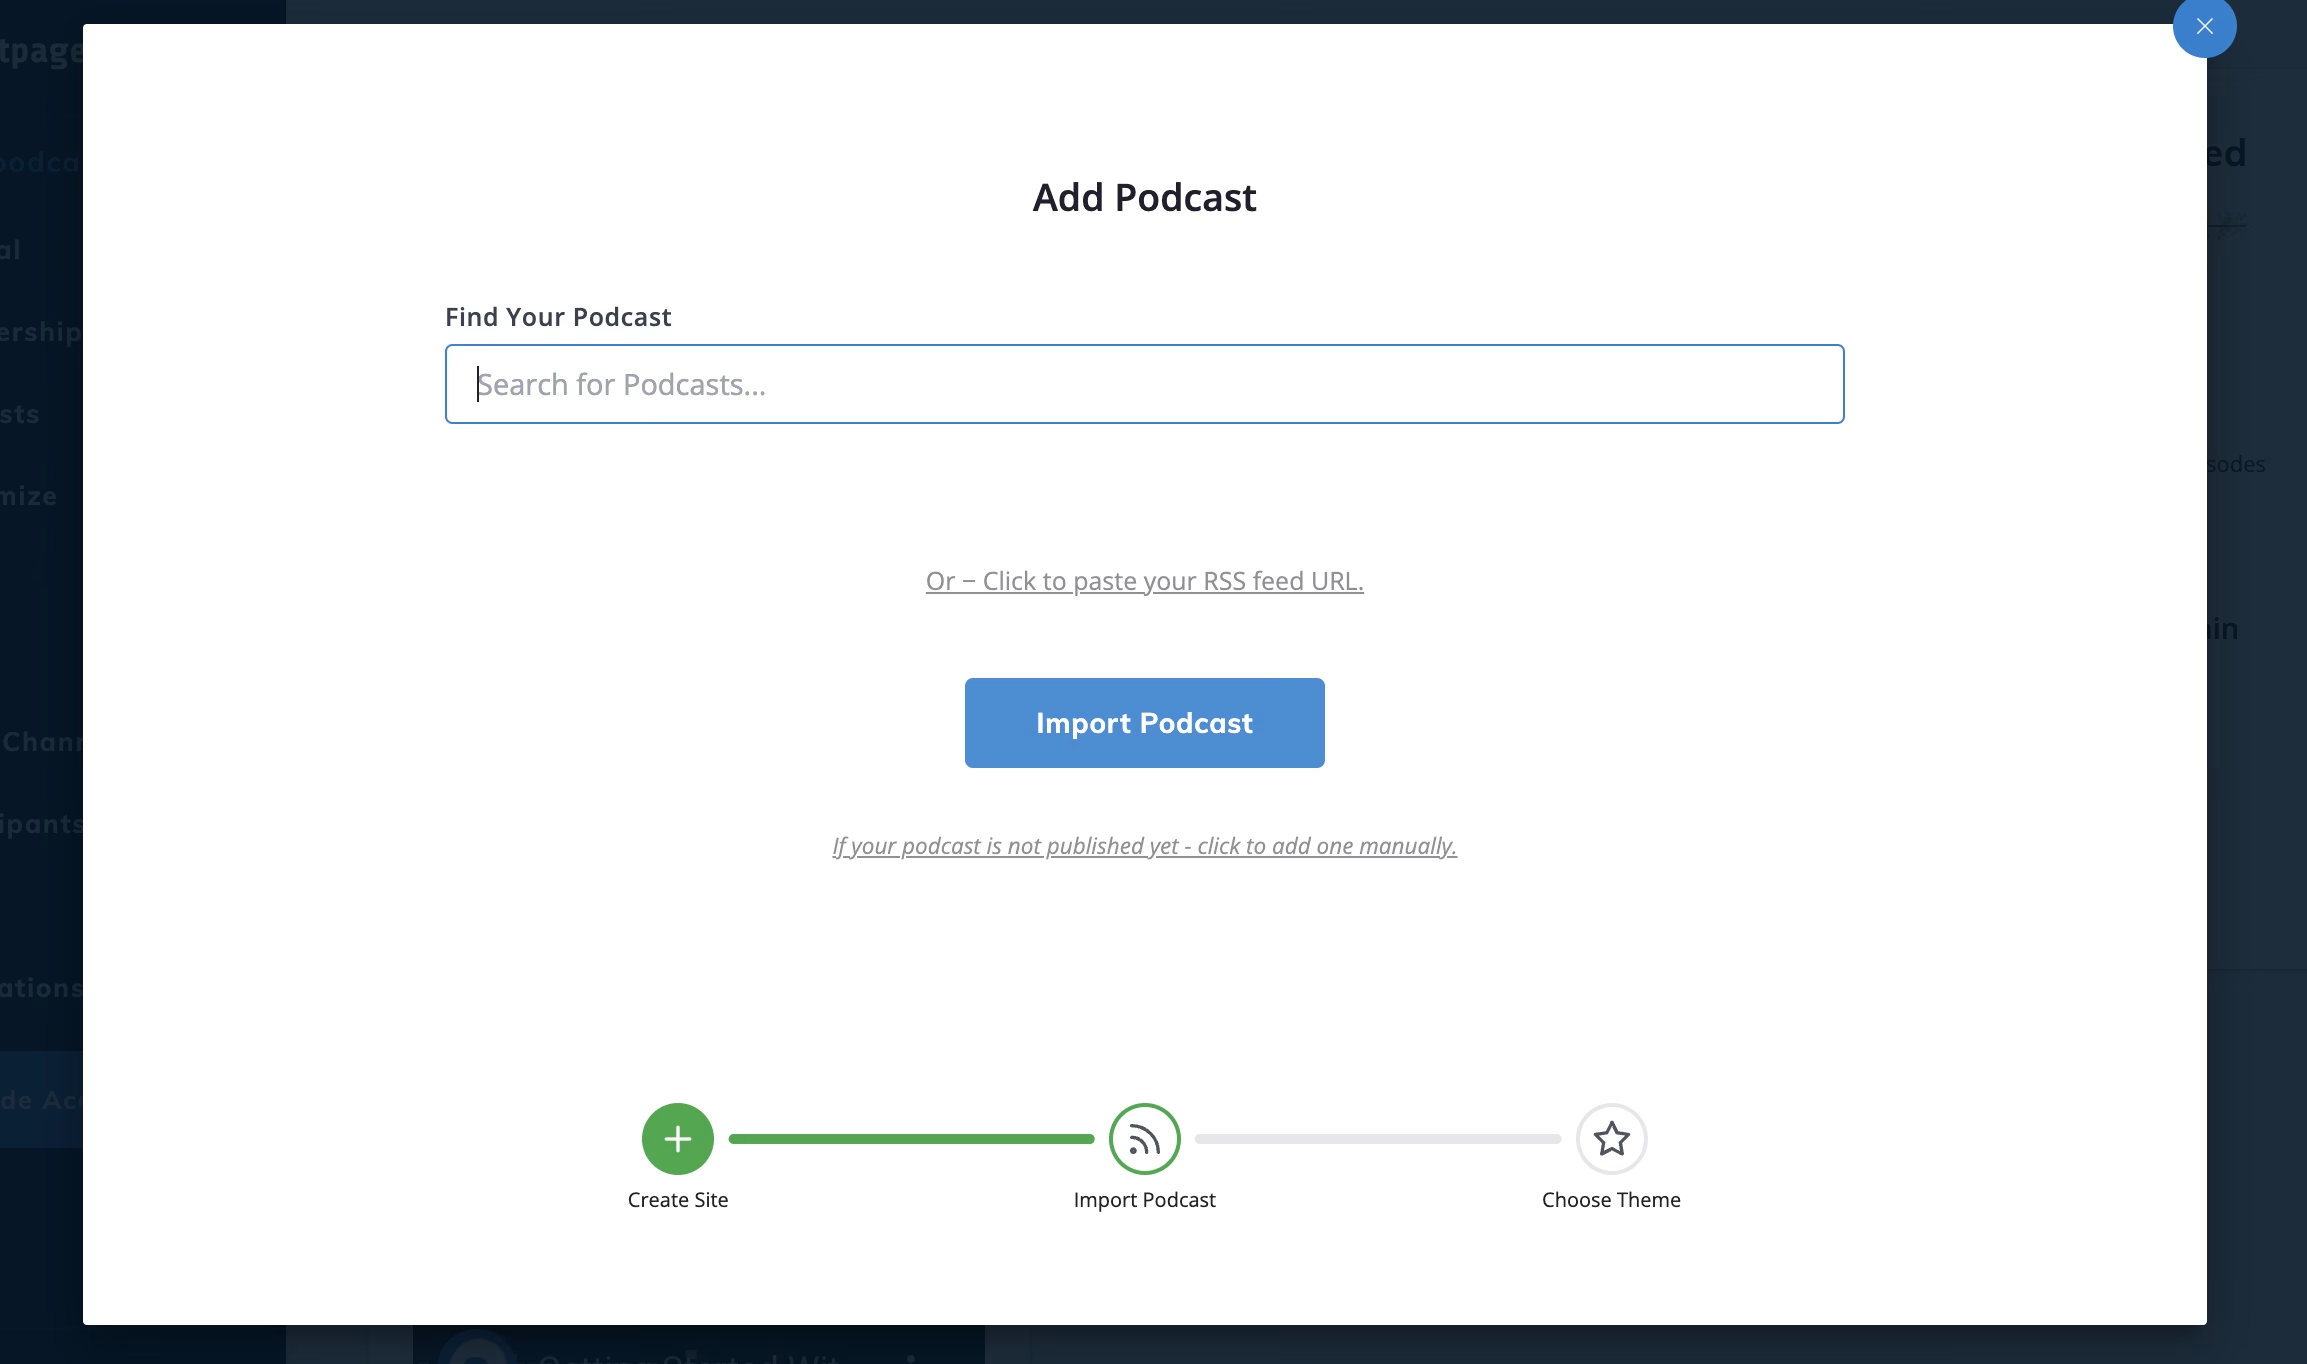
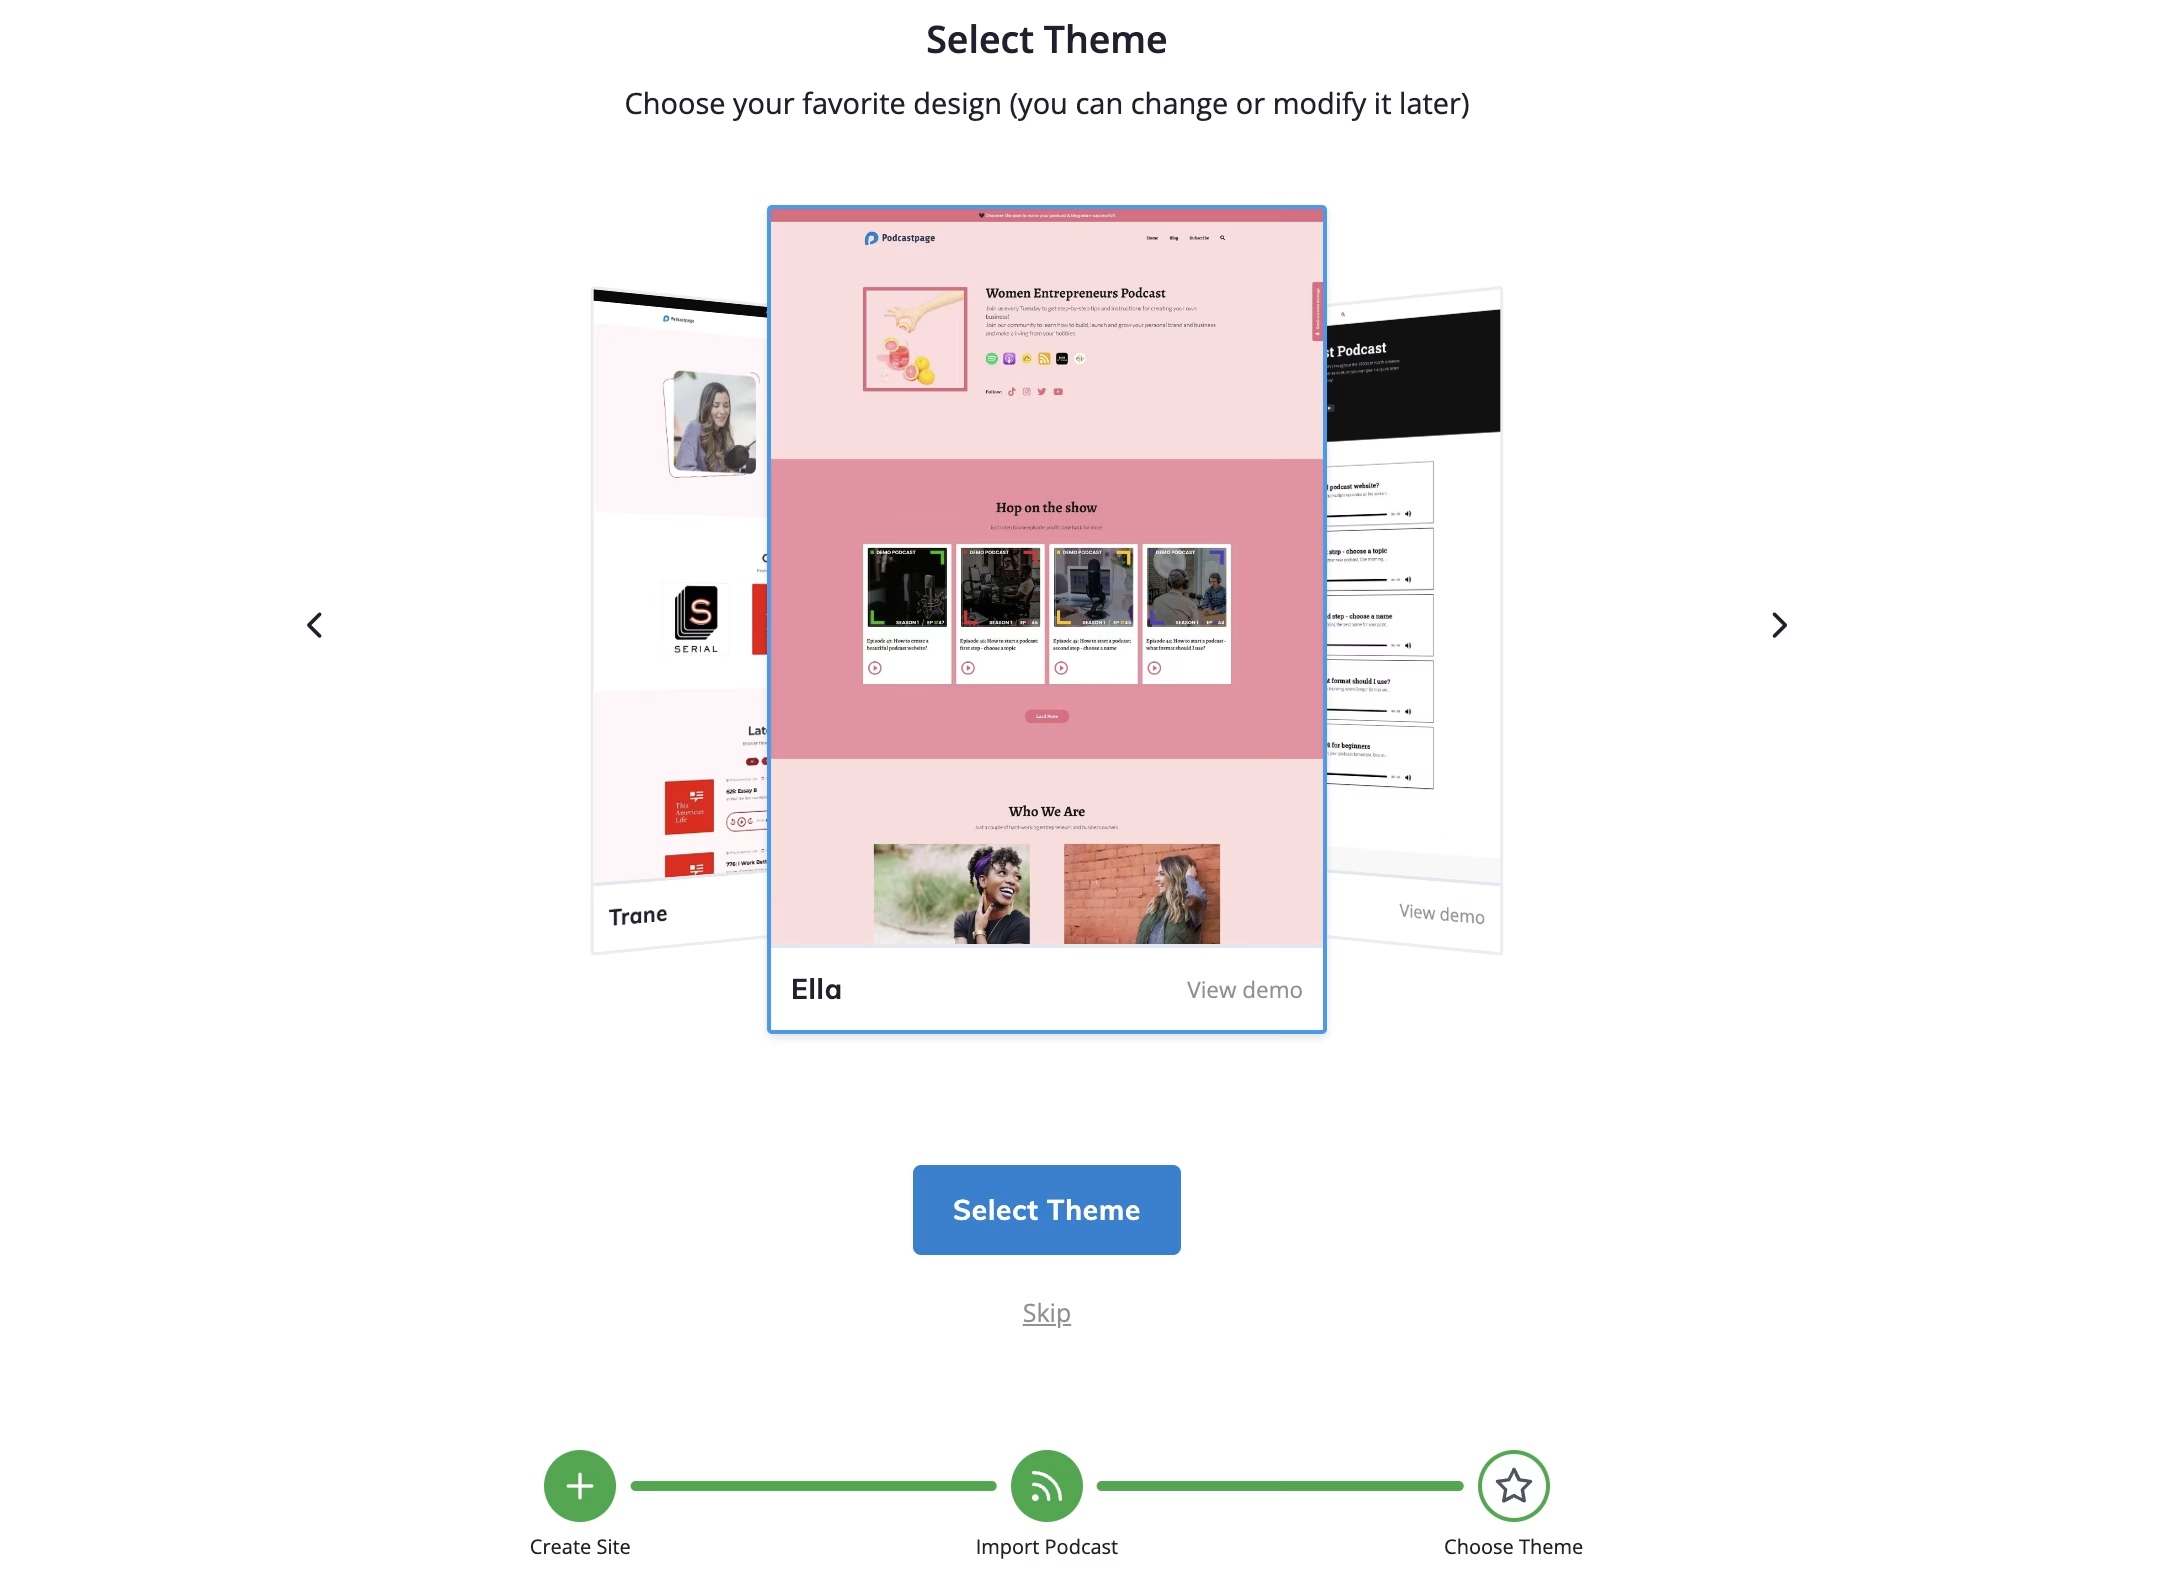
Next, you can insert your podcast name, provide a description, and upload your podcast artwork. Then, click on Create Podcast and choose a theme to apply to your website:
Once you complete the setup process, you’ll get access to an intuitive dashboard where you can view website analytics, configure SEO settings, change your subdomain (or connect a custom podcast domain), and more.
If you want to offer paid membership plans, you’ll need to connect your private podcast website to a payment gateway. When you upgrade to a premium Beamly account with the Membership Add-on, you’ll be able to connect your site to Stripe.
2. Add Your Membership Plans
With your podcast website all set up, you’re ready to add membership plans to keep some (or all) of your episodes private. The good news is that Beamly offers built-in memberships so you don’t need to rely on third-party integrations.
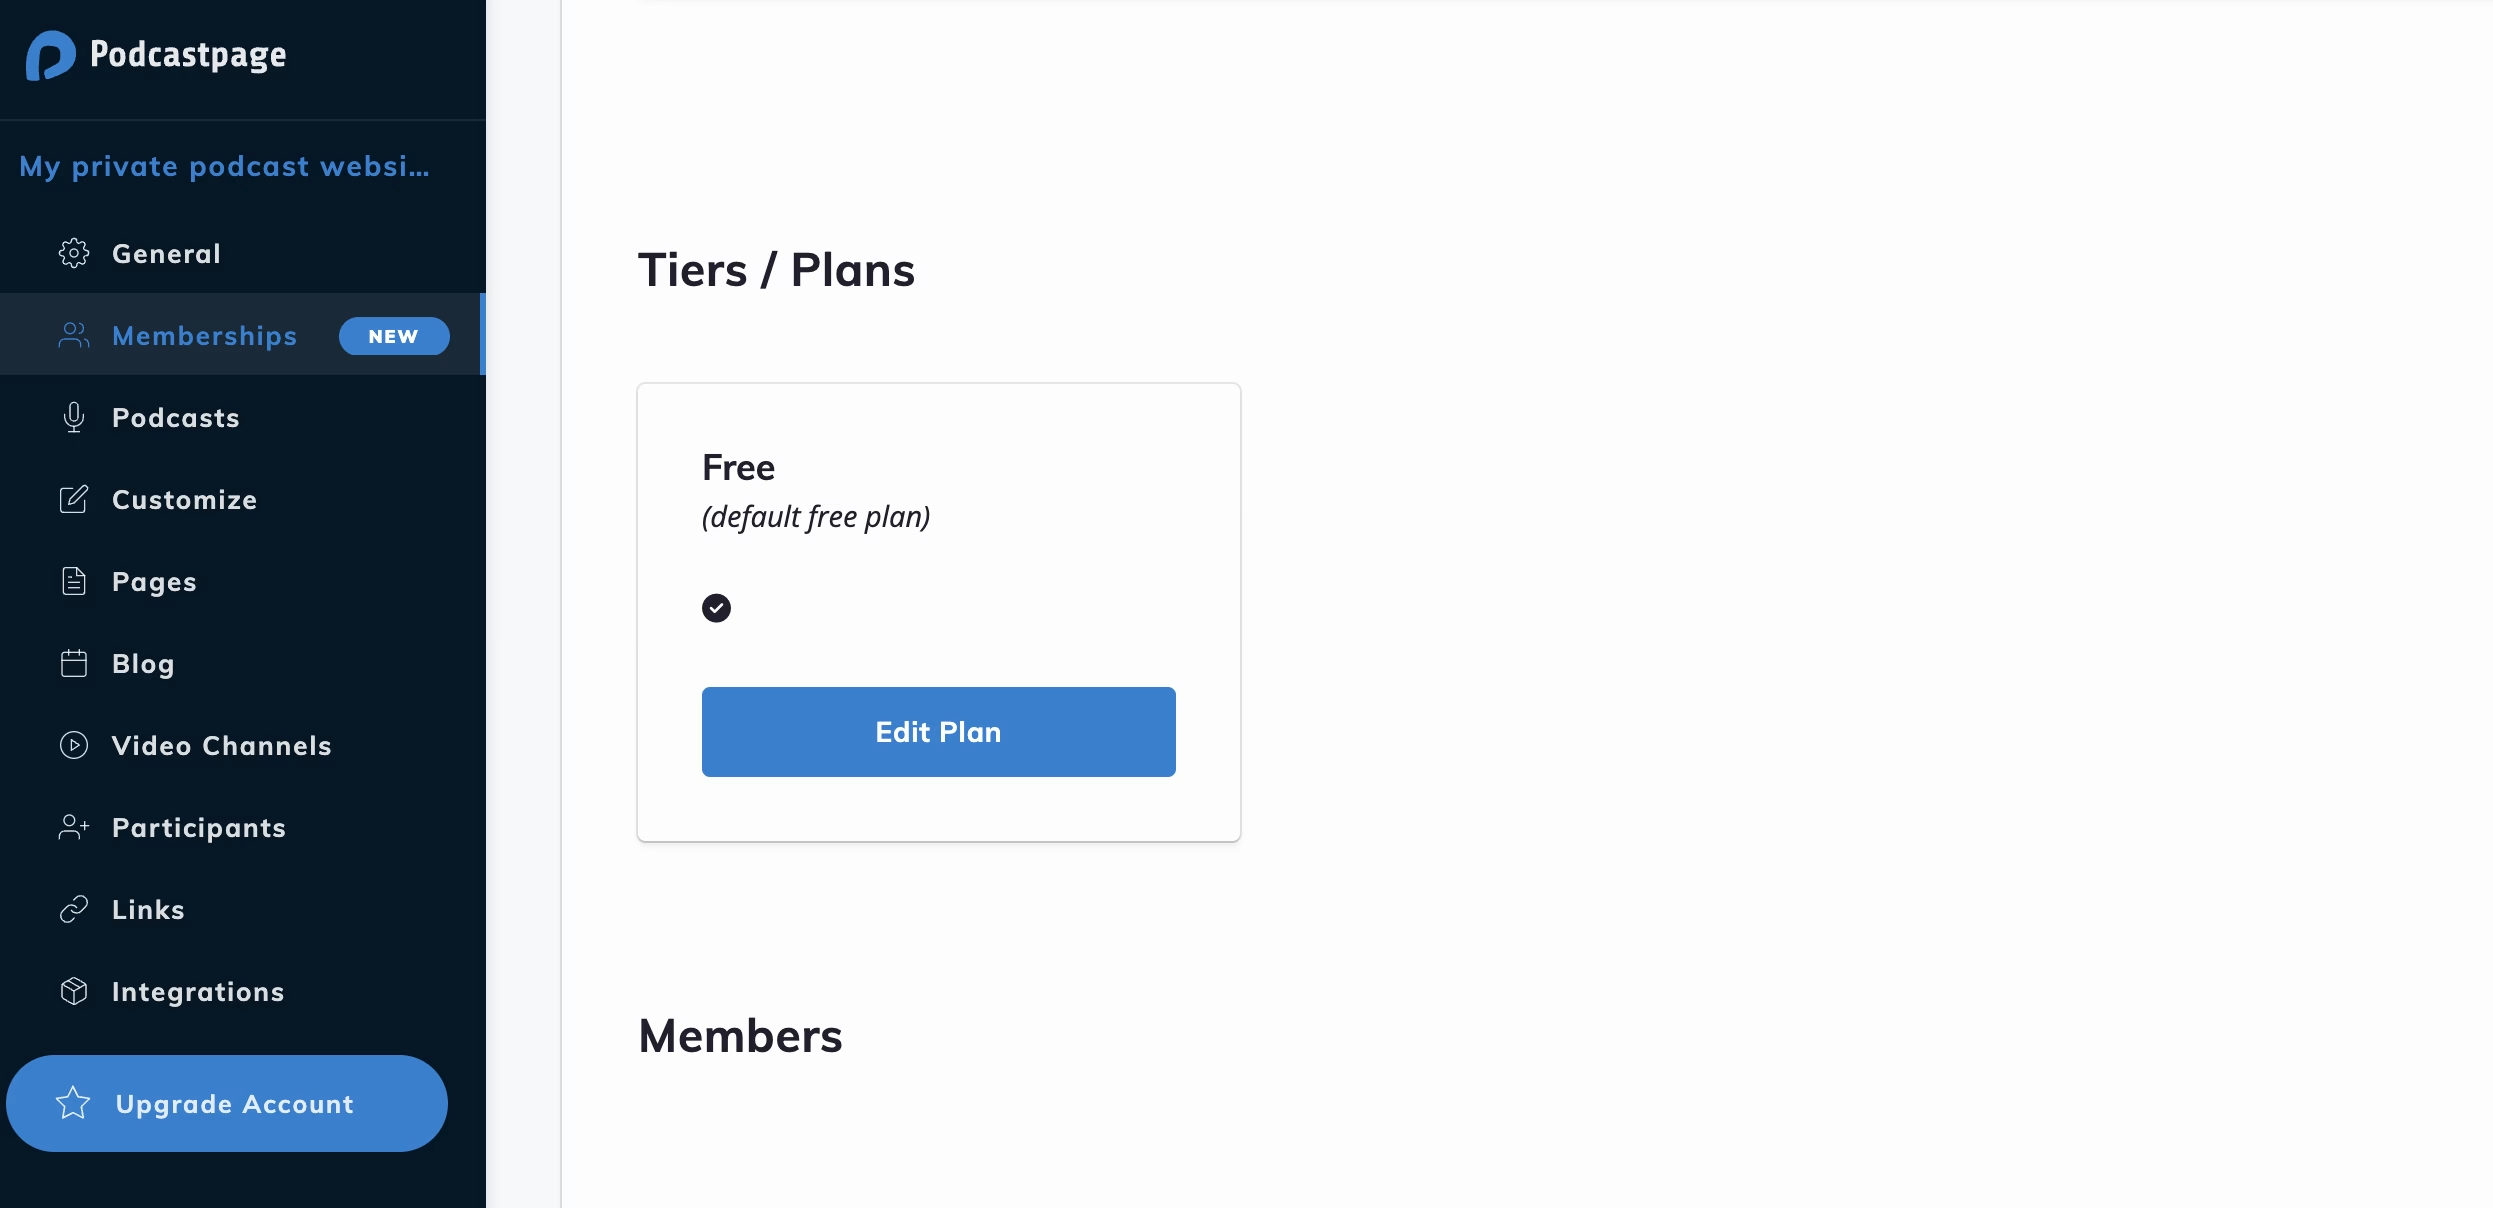
By default, Beamly comes with a free membership plan, so you can offer your private podcast to those who are subscribed via email. We recommend keeping a free tier so that you don’t restrict your listener base too much.
You can configure your free plan by navigating to Membership Plans within the Beamly dashboard and clicking on Edit Plan:
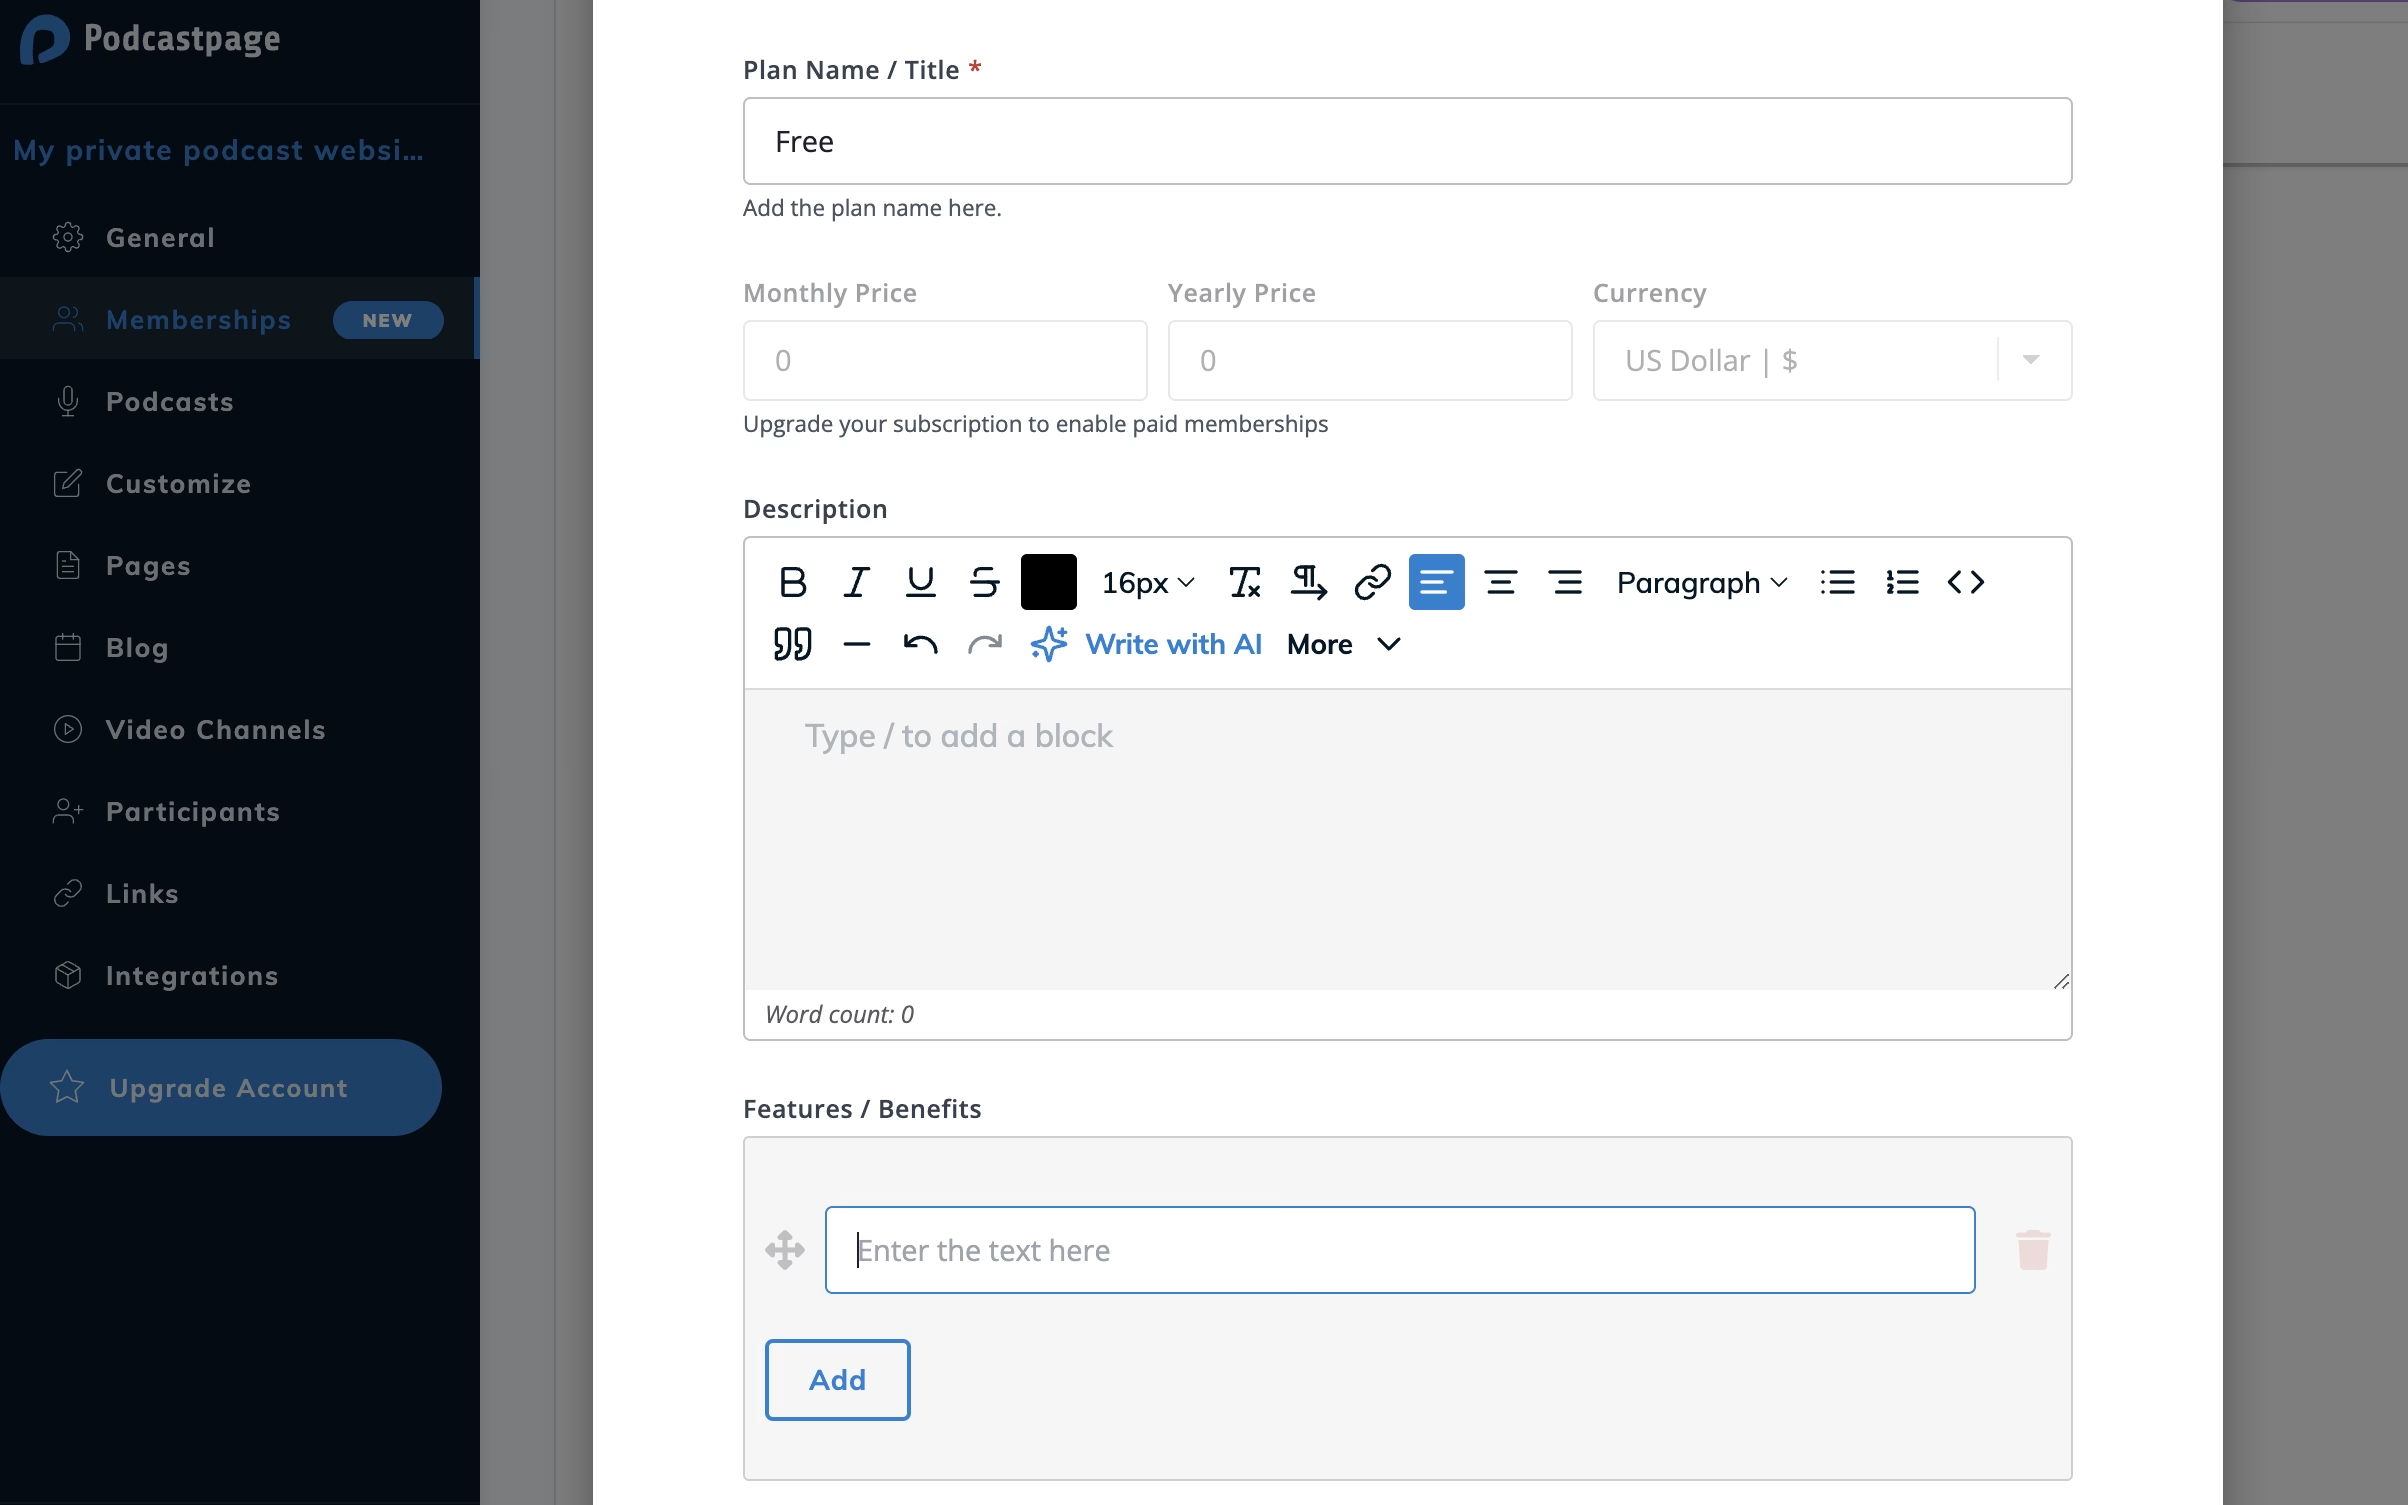
You can start by providing a brief description of your plan. You can even utilize the built-in AI content writer to create this. Then, add the features and benefits of your plan:
If you don’t want to make the plan publicly accessible, slide the toggle to Hidden.
You’ll need a premium version of Beamly to provide paid membership options. With Stripe activated, you can add the price of your plan.
3. Restrict Content Access
One of the most important elements of setting up a website for a private podcast is protecting your content. Of course, you’ll need to add your episodes, videos, and blog posts to your website before you can restrict access.
While editing/adding membership plans, you’ll find restriction options right at the bottom of the editor. Here, you can choose which content is available to members who purchase this specific membership plan:
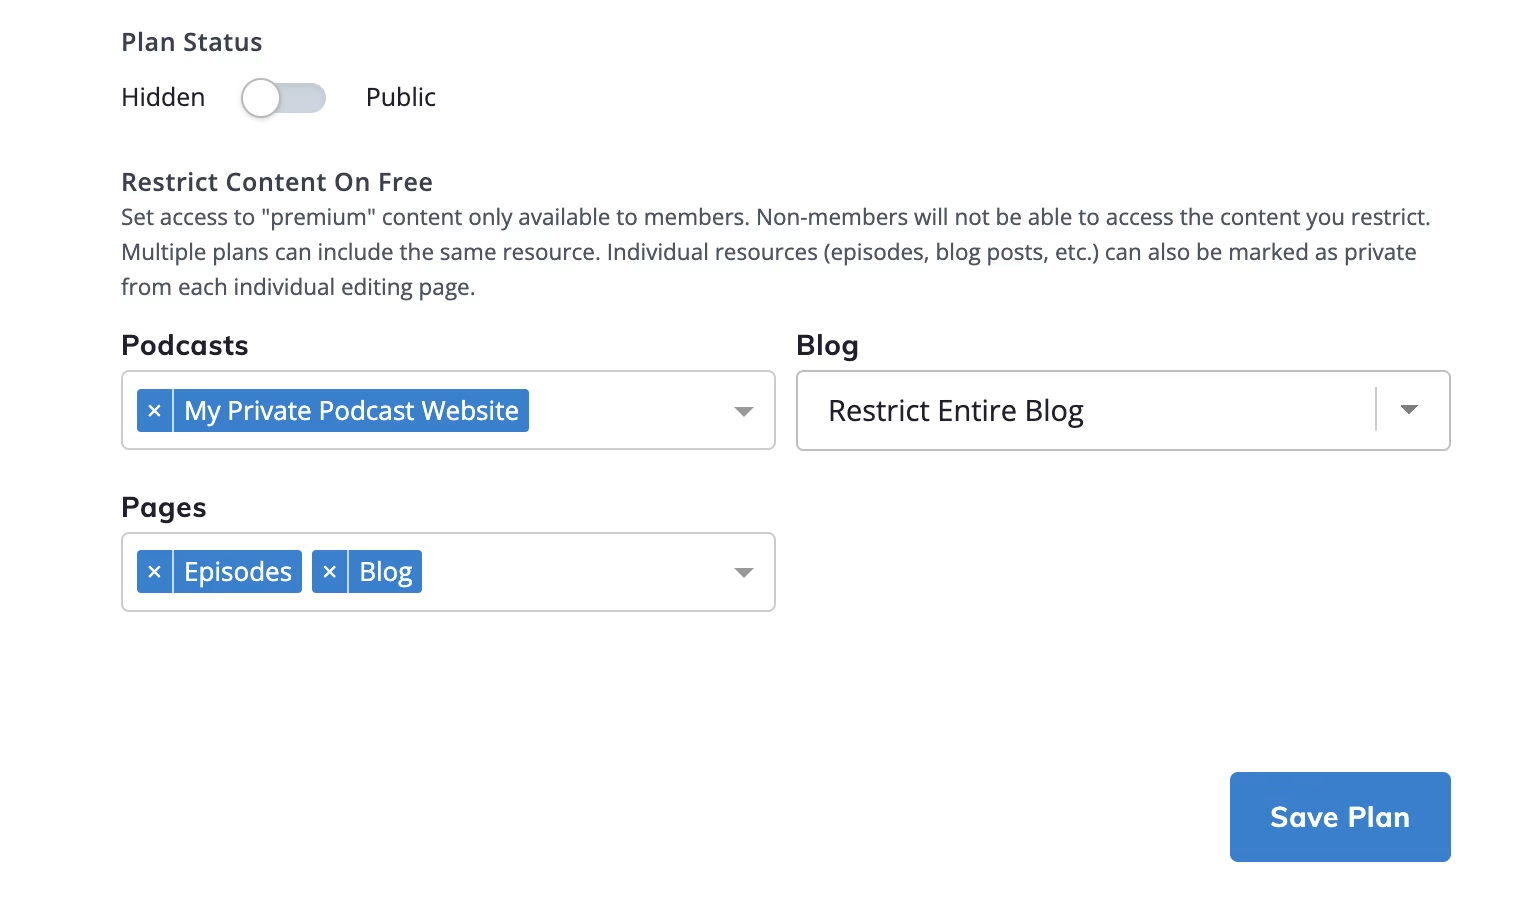
For example, you could restrict access to all episodes, your entire podcast blog, and all videos on your YouTube channel.
This means that when non-members request access to protected content, they’ll be prompted to register or upgrade their plans:

Note that multiple plans can provide access to the same resources.
What’s great about Beamly is that content restriction is super flexible. You can even make it so that individual episodes, blog posts, videos, and pages are only available to paying subscribers (rather than restricting access to an entire content type).
Let’s say you want to make a special podcast episode exclusively for members with a certain plan. You’ll need to go to Podcasts in the dashboard, find the episode, click on the Edit link, and navigate to the Restrict Access section:

Here, you can use the dropdown menu to decide which membership tiers have access to this episode.
This makes your episode private to a select group of listeners. You can do the same thing for individual blog posts, videos, and web pages.
Conclusion
Setting up a private podcast enables you to generate revenue from paying subscribers. With Beamly, you’ll be able to set up a full membership website with multiple free and paid tiers and restrict access to episodes, videos, and blog posts.
First, you’ll want to create a free Beamly account and complete the setup process. Then, start adding your membership plans. You could create a free plan to give followers a taste of the benefits that come with the paid memberships. Then, limit access to your content so that only members can view it.
Beamly has built-in membership functionality, so you don’t need to install third-party tools. You’ll also get a customizable audio player, automatic episode (and video) imports, and stunning pre-made layouts. Get started for free today!


